How to Use a Qalam Pen for Arabic Calligraphy
Sodiki AbdullahArabic calligraphy is more than just handwriting, it's rhythm, patience, and control. Whether you're a beginner or refining your craft, mastering the qalam pen (bamboo or reed pen) is a foundation of every elegant stroke.
This tutorial walks you through every stage: how to hold, cut and train with your qalam. Plus a 30-day structured practice plan and printable worksheet to accelerate your progress.
Workspace & Essential Tools

A foccused workspace makes all the difference. Set up your desk with the following tools before you begin:
- Bamboo Reed Qalam Pen (3-5 mm width recommended)
- Calligraphy Ink: Schmincke ink or sumi works best
- Calligraphy Paper: 120-200 gsm smooth, non-absorbent
- Sharp utility knife / hobby blade
- Fine file or 400-800 grit sandpaper
- Tissue or watercontainer for cleaning
Keep your workspace slightly tilted (10–15°) to allow natural arm movement.
How to Hold a Qalam Calligraphy Pen
a correct grip creates flow and consistency. Follow these steps carefully:
- Hold a qalam like a pencil, about 2-3 cm from the nib.
- Keep your back straight and your wrist relaxed.
- Maintain a pen angle of 30°–45° for Naskh script or 25°–35° for thuluth
- MOve primarily from your shoulder, not the wrist, to produce smooth long strokes.
Pro tip: Beginners often press too hard. Let gravity and ink do the work. The qalam should glide, not scratch.
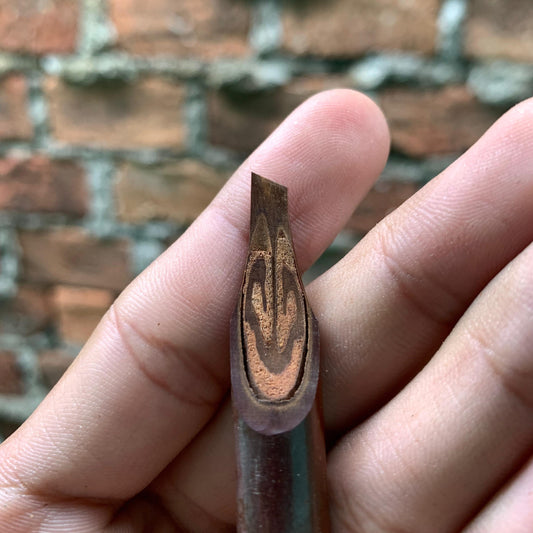
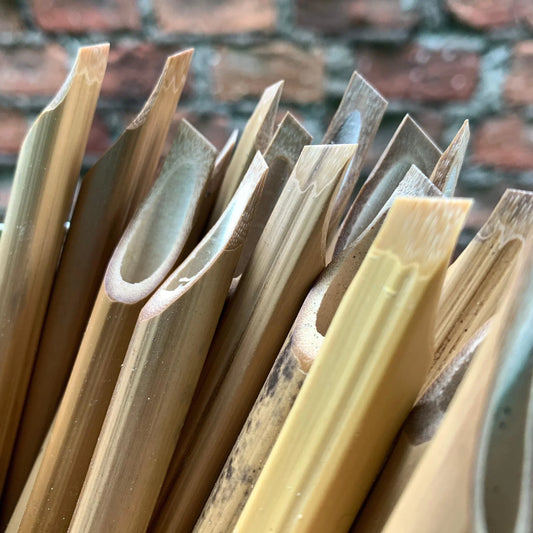
Cutting and Shaping the Nib (Safety First)

Cutting the nib correctly determines your line quality. Always work on a stable surface and cut away from your hand.
Step-by-step:
- Slice the tip of the bamboo at a ~30° angle from its axis
- Creat a small central slit (0.2-0.5 mm) for ink flow
- smooth the edges using find sandpapaer until clean and even.
- Test on paper. If the line feel so thick, refine the edges slightly.
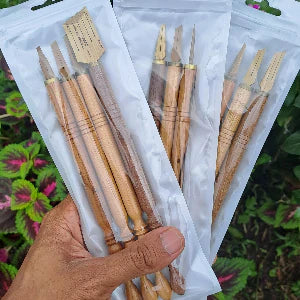
Need a ready-made pen nib? Try our Qalam Bamboo Calligraphy Pens. Pre shaped for professional grade control.
30-Day Practice Plan + Printable Sheet
Consistency and book is the real teacher in calligraphy. Here's a 30-day plan to develop muscle memory and rhythm.
- Day 1-3: Learning Basic Strokes - Horizontal, vertical, and diagonal (3x10 sessions)
- Day 4-7: Combine Strokes - from loops and hooks.
- Days 8-14: Write basic letters: Alif, Kaaf, Lam (20 repetitions each)
- Days 15-21: Practice transitions and short words.
-
Day 22-30: Composs full lines; focus on spacing and proportion.

Download the Printable Thuluth Practice Sheet (Alif, Kaf, Lam). Perfect for daily structured exercises
Printing guide:
Use A4 glossy artpaper 120 gsm
Common Troubleshooting
| Problem | Likely Cause | Quick Fix |
|---|---|---|
| Ink blotting | Paper too absorbent or heavy pressure | Switch to smoother paper, lighten touch |
| Broken or uneven lines | Asymmetrical nib or thick ink | Clean nib and adjust slit width |
| Uneven angles | Inconsistent wrist position | Recalibrate pen angle frequently |
Continue Your Journey
Your first qalam session won't produce perfect letters, and that's the point. Arabic calligraphy rewards persistence. After 20-30 focused hours, you'll begin to notice smoother transitions and confident control.
If you're ready to upgrade your tools, explore our handcrafted collection:
- Qalam Jawi Reed Pens - Ideal for small naskh script
- Bamboo Reed Qalam Pen - Classic texture and comfort for long sessions
- Handam Bili Reed Pen - For beginners and intermediate learners
FInal Thoughts
Mastering the qalam is an act of discipline and reflection. Each stroke mirrors your patience and precision. Keep your tools sharp, your ink clean, and your routine consistent. Over time, your lines will begin to speak their own rhythm.